In the current time of social distancing and self-isolation, it's useful to have a DIY document camera that can act as a cheap alternative to a whiteboard when you're trying to teach a class online.
You can improvise a document camera by making a DIY stand, and using your phone as the camera.
Here's an example of what to expect from this setup:
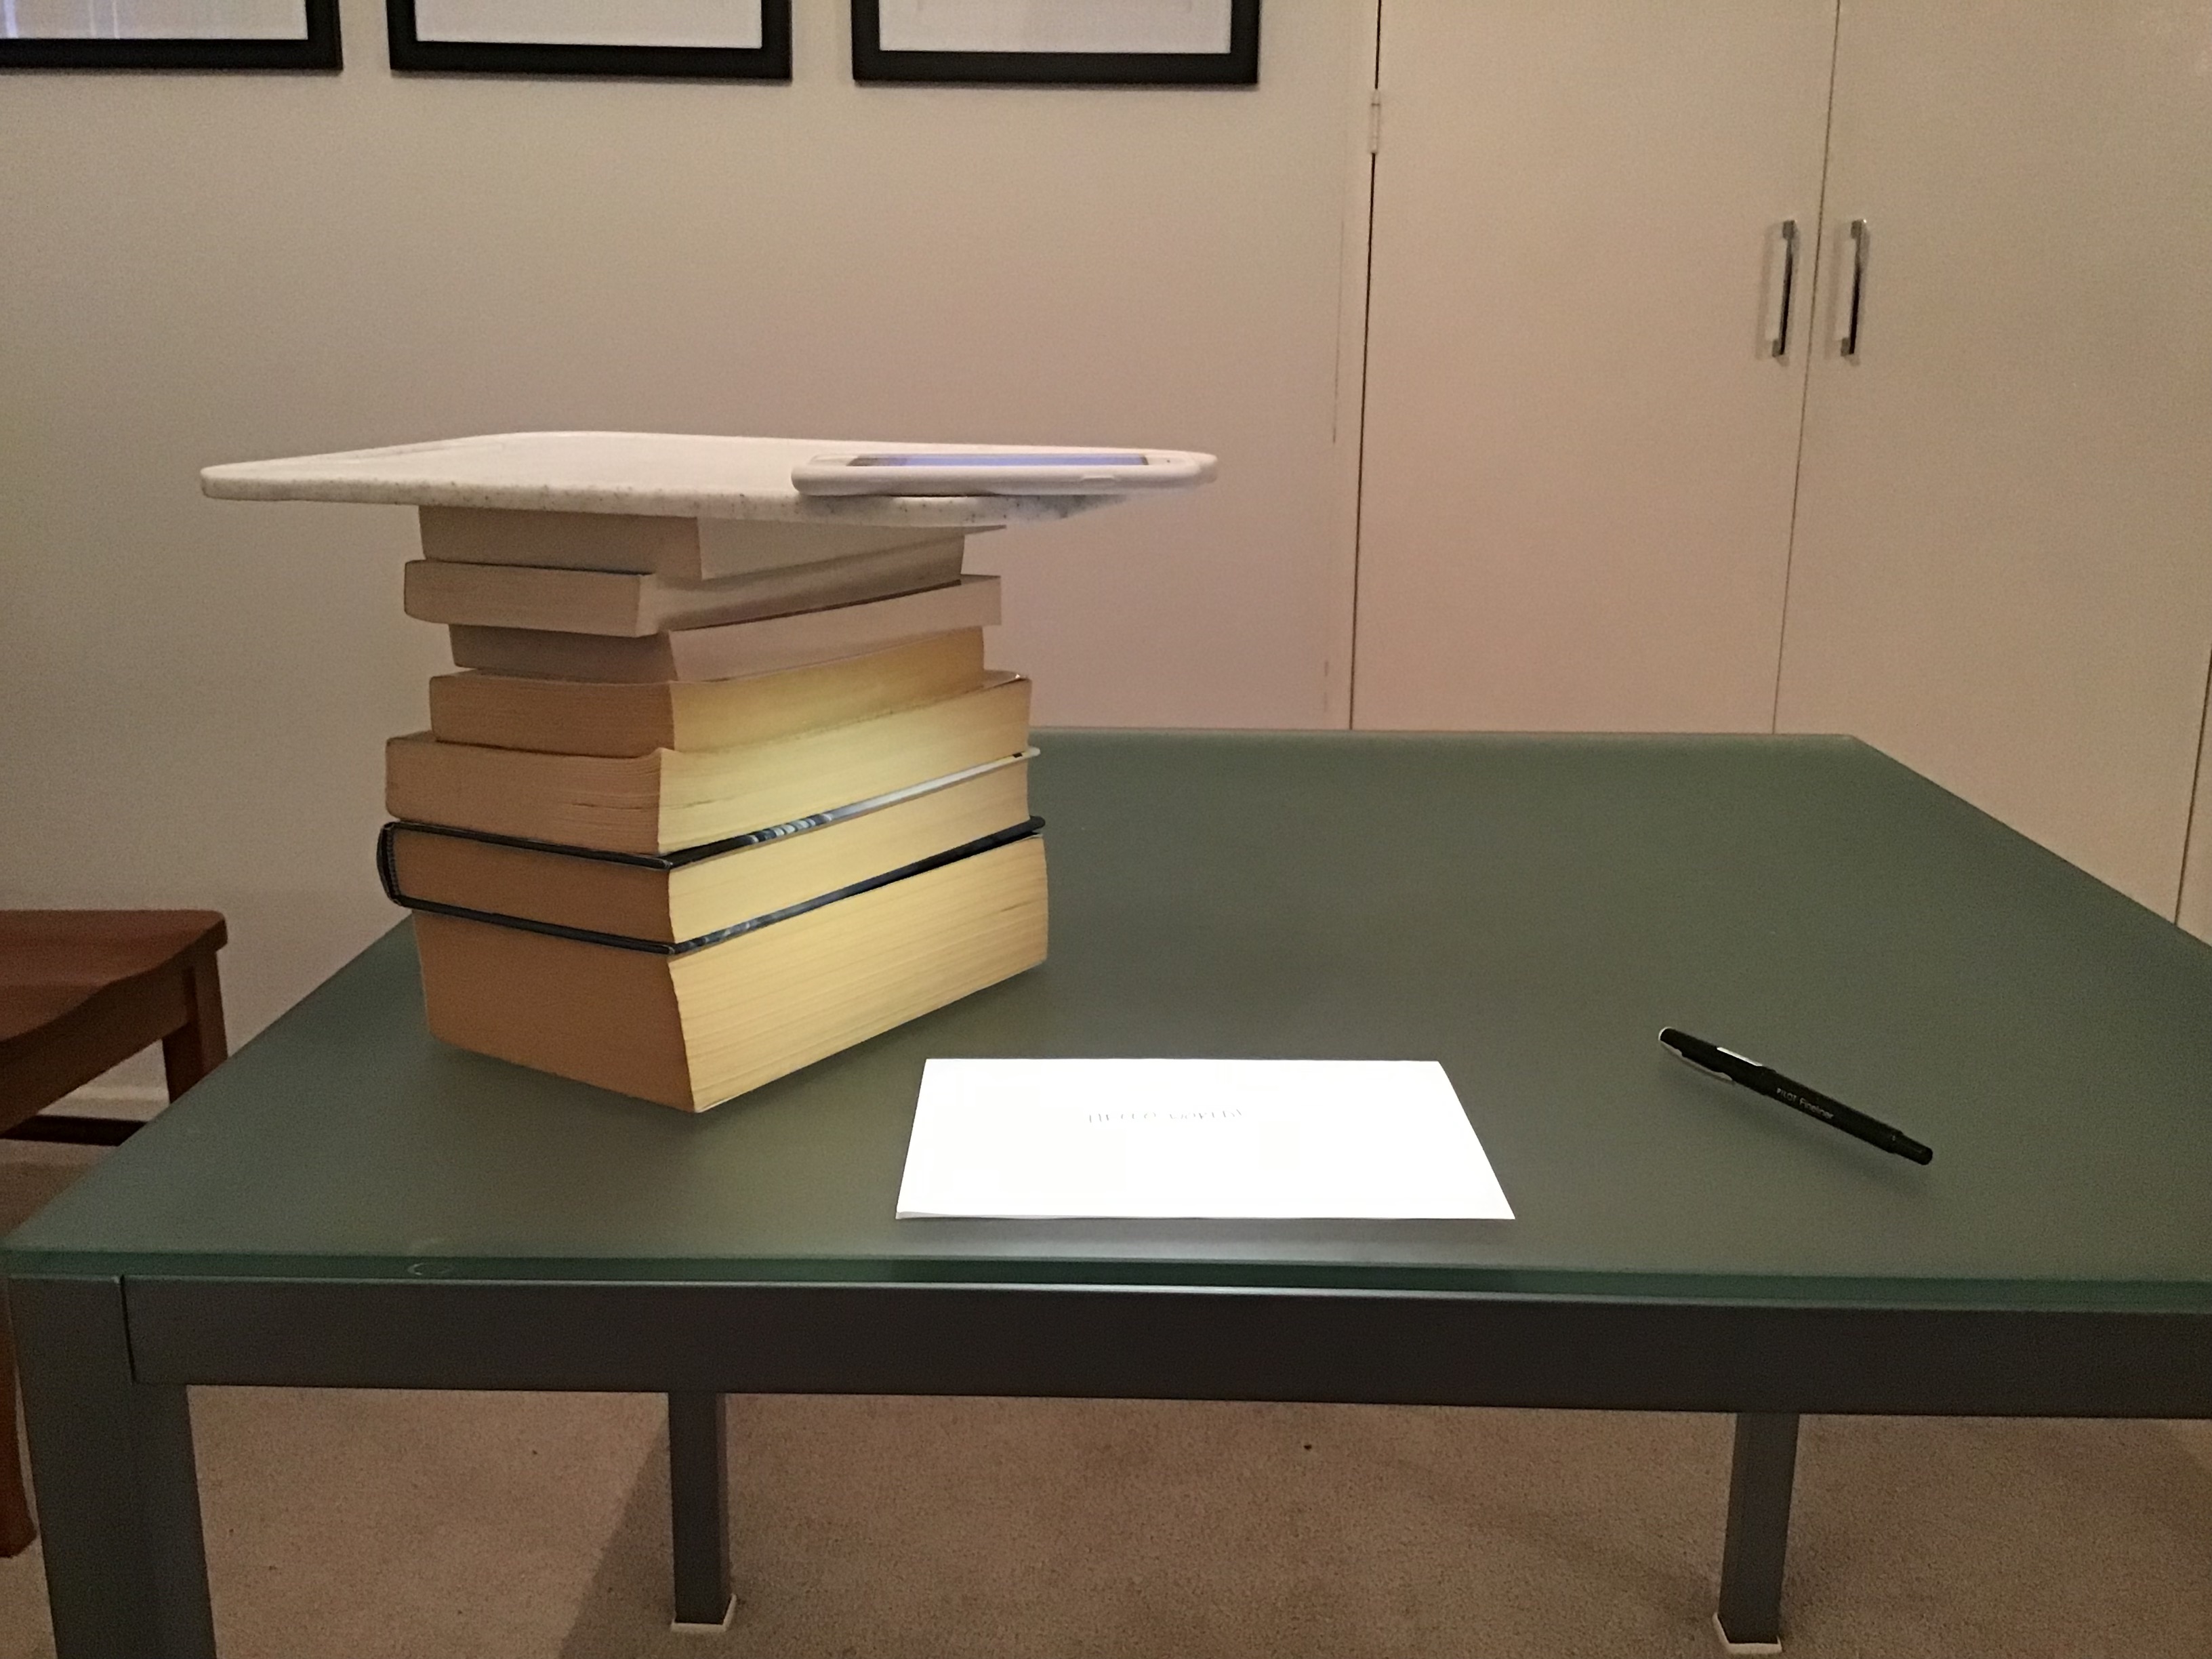
All you need is a stable surface to place your phone on, and something to raise that surface up by 20-25cm (8"-10"). This is high enough to give you plenty of drawing space while being low enough to let you monitor the phone's screen.
For example, a chopping board placed on top of some books works great:
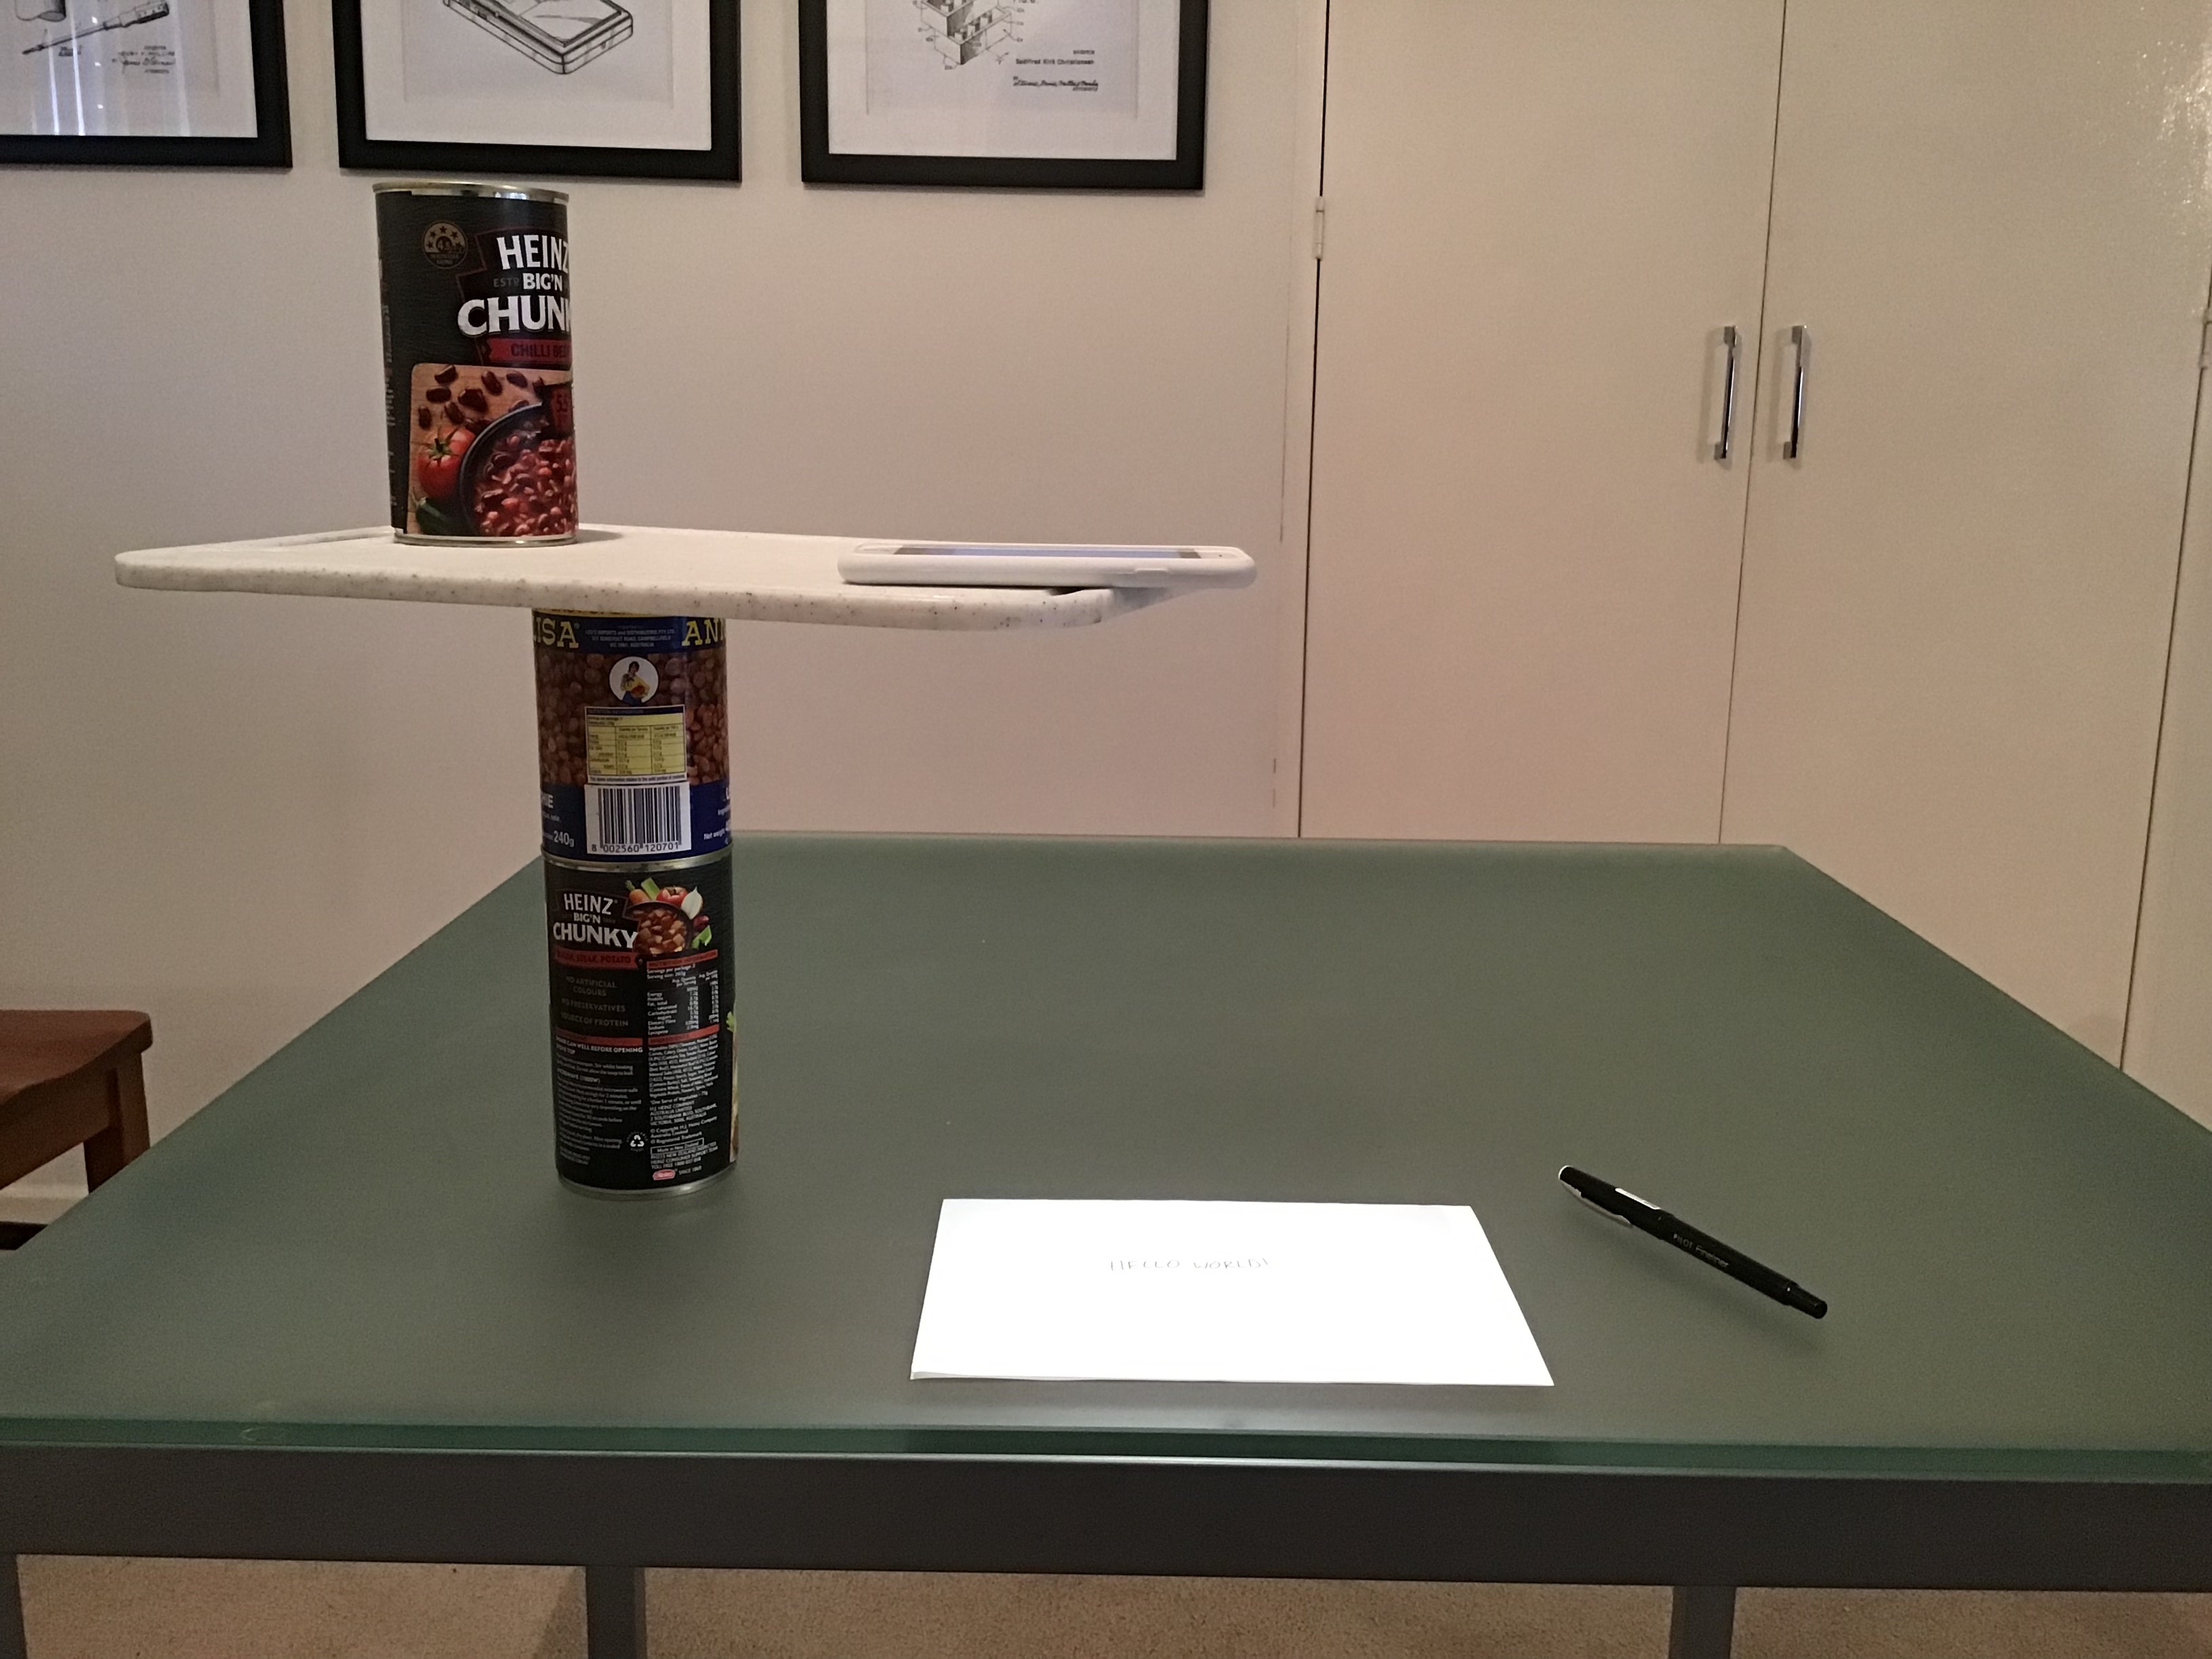
As do food cans (a can is placed on top of the chopping board for stability):
Or even some cardboard on top of a pasta box (from http://info.iet.unipi.it/~luigi/document-camera/):

Before you start filming, you should follow these steps to get yourself the best possible video from this setup:
If you shoot videos in the highest quality your phone allows, you might find that they take a long time to upload/share with people (especially given that the internet is under more load than usual).
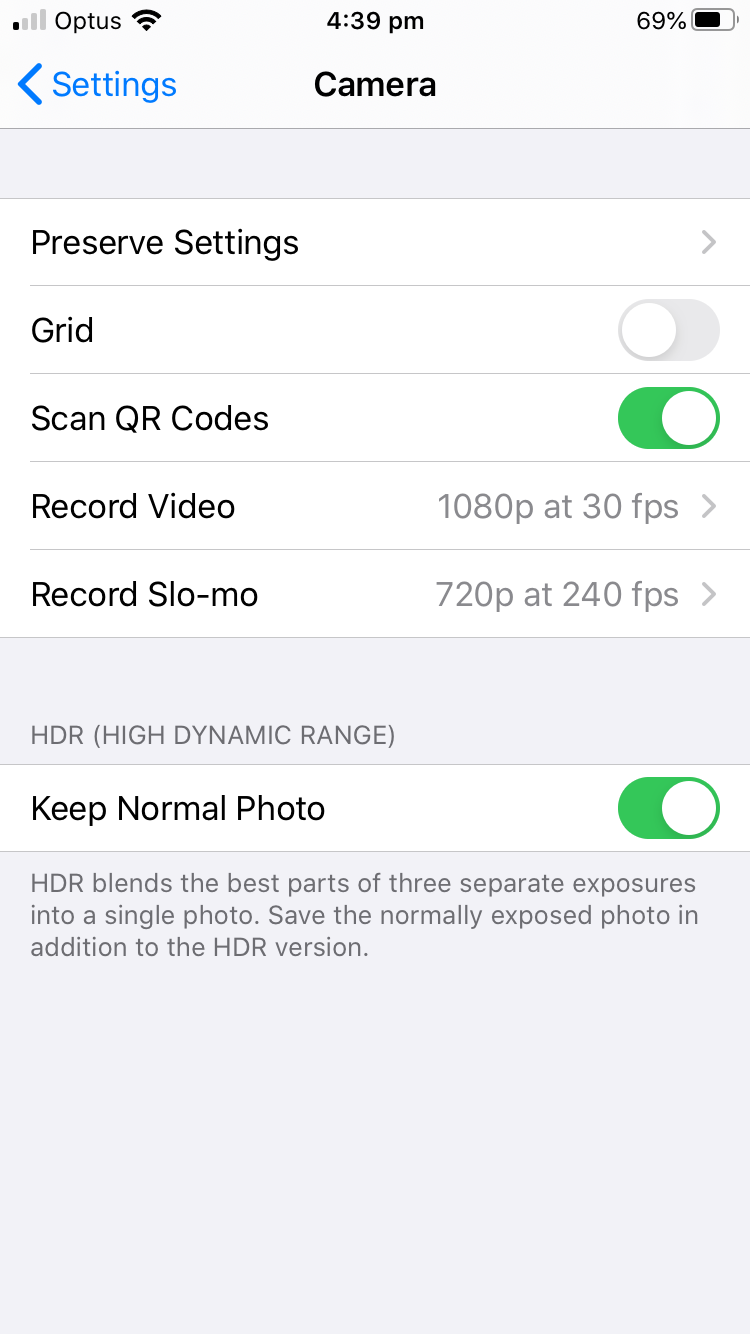
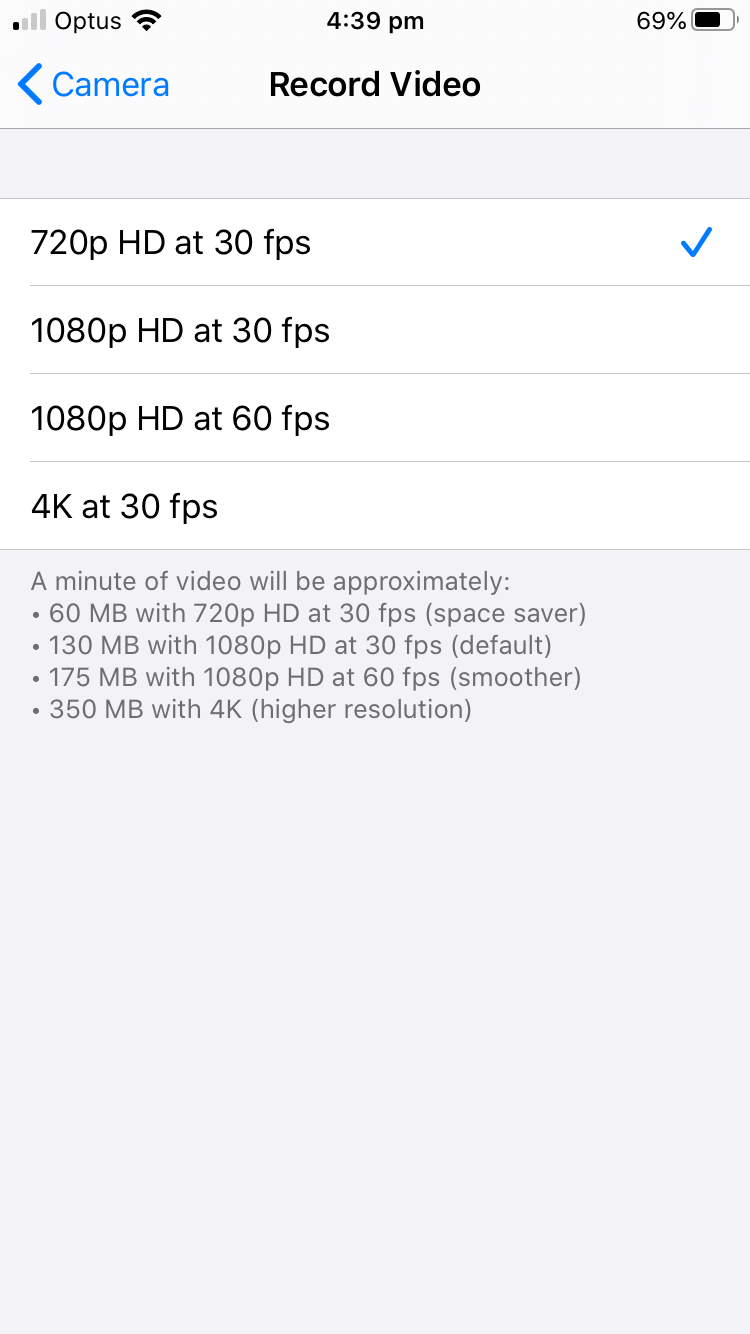
By reducing the video quality, you'll make the video easier to upload/share. On newer iOS devices, you can adjust the video resolution right in the Camera app. On older devices, you'll need to go into the Settings app to change the resolution.
Go into Settings > Camera > Record Video and choose "720p HD at 30fps".
You don't want to make a 10 minute video, only to realise that it's upside-down. The easiest way to make sure your video is in the right orientation is to rotate the phone while holding it upright, then place the phone down while keeping it rotated.
It can be very distracting to watch a video when the camera bounces back and forth between focusing on the paper and your hand.
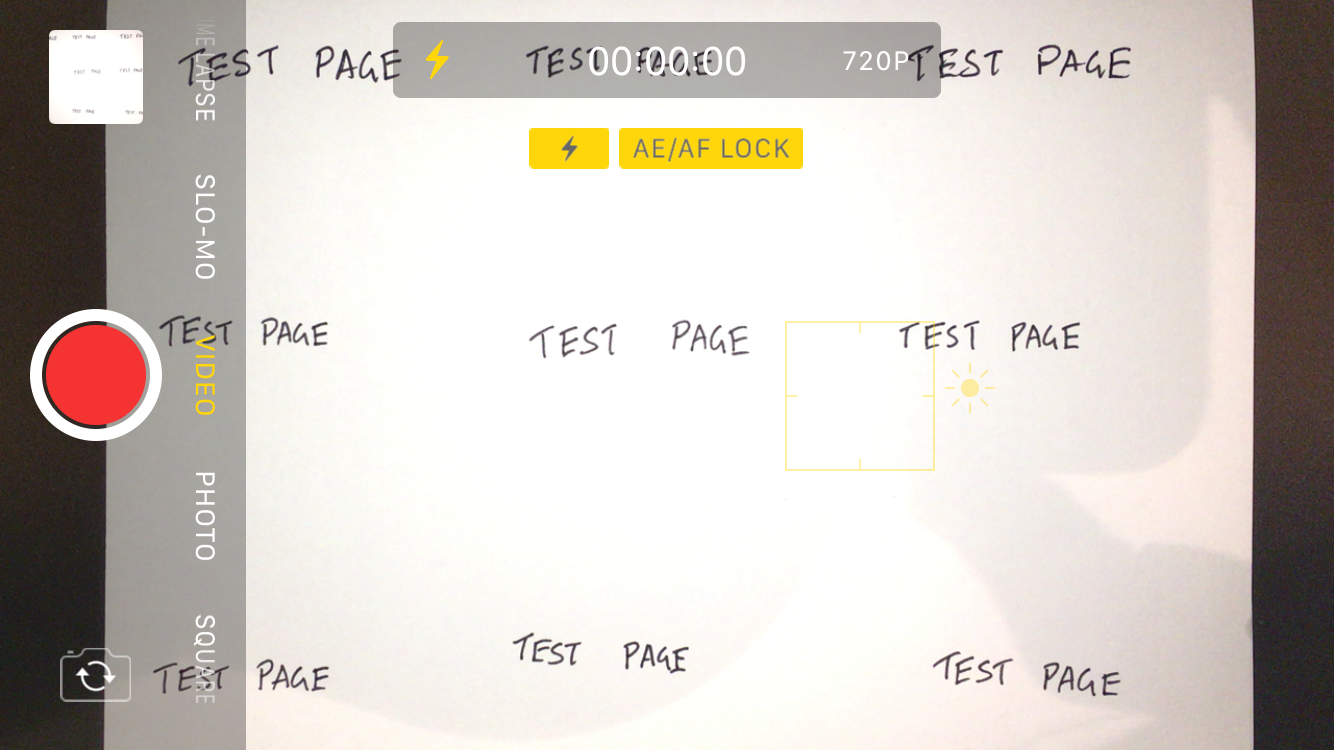
Fortunately, on iOS you can lock the camera's focus by tapping and holding on the screen until you see a message saying "AE/AF LOCK" appear. This means that the camera's exposure and focus are locked and won't change while you're filming.
Fancy document cameras have built-in lights that reduce shadows on the paper and make things easier to read. Fortunately, the flash in your phone will work just as well.
Without the flash enabled, my setup is severely affected by shadows.

Turning it on improves things, but there's still visible shadows.

The final step is to adjust your camera's exposure by tapping and slowly dragging up and down on the screen. This only works if you've put your camera into AE/AF LOCK mode.
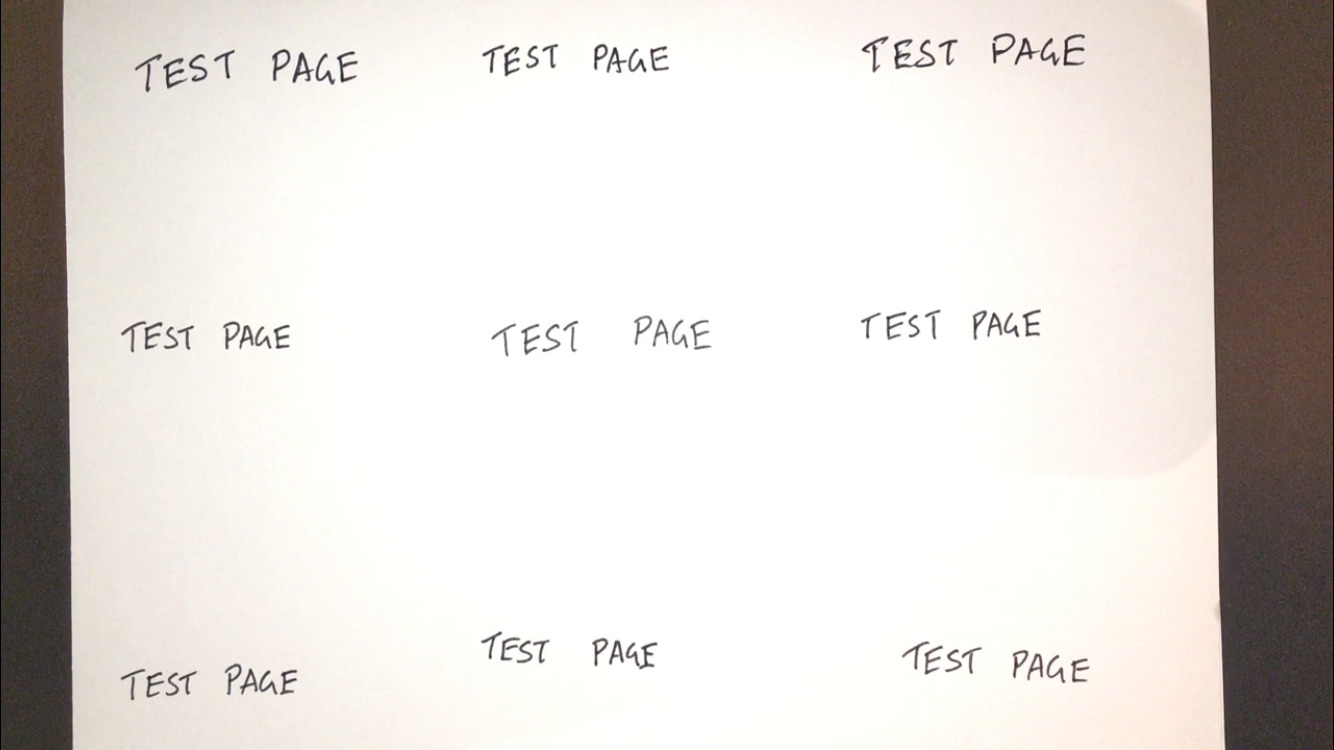
While adjusting the exposure, you should use a test page with writing on all parts of the page. This will make sure that you don't end up with settings that make one part of the page look great, while making the other part unreadable.
You'll have to find a balance between getting rid of shadows, and keeping the paper readable. It can be useful to use a dark felt-tip pen rather than a ballpoint pen.
At this point, you're good to go!